Back to Top
Prepare your bed by turning under or tilling in compost or well-rotted manure. Separate the cloves and plant each individual clove, root end down. Plant garlic 1" deep, 4-6" apart in 18" spaced rows roots side down, just deep enough so that the tip lies level with the soil surface. Do not use mulch as it may rot bulbs. After planting garlic, water well or lightly in heavy soils, and only water again when the soil is dry. Remember, garlic love water and food, but they must have good drainage or the bulbs will rot. In the spring, feed the garlic with either composted manure or a well-balanced fertilizer before the bulbs begin to enlarge. Keep the bulbs well watered and weeded; they grow best with at least 1" of water per week. Remove any seed stalks that form to focus the garlic's energy into forming cloves. Garlic should be spring planted in very cold areas.
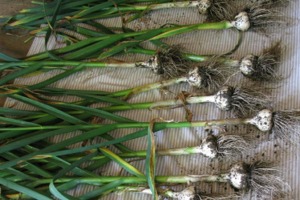 A few weeks before starting to harvest stop watering the garlic. There are different rules of thumb regarding the best time to harvest: when the lower leaves are ½ -3/4 brown or when the plants are 40% brown, 60% green. The dying back of the leaves is only an approximate indicator. Inspect a few bulbs in the ground by carefully scraping away the dirt. Pull the garlic from the ground when the bulb has reached a good size and before the wrappers begin to deteriorate or the bulbs begin to split open, if not the bulbs will not keep well. Learning when to stop watering and when to harvest comes with experience. Use a flat, narrow-bladed shovel to loosen the ground beside the garlic and pull the plants by hand. Be careful as garlic bruises easily.
To cure, do not leave in the sun, because they might sunburn and rot. Cure your garlic in mesh bags (like onion sacks) in a cool dry area. You should let the bulbs dry or cure for about a month. They can be stored for up to 8 months for soft neck garlic and just a few months for hardneck garlic if kept at their optimum storage temperature of 35°-45°F.
